Windows 10 was released in the year 2015. Windows 10 is being used by millions of people around the world. It is one of the best Windows versions ever created.
Stats online have shown that some people still stick around with Windows 7 because they feel it is easier to use and not as complex as Windows 10 as they say.
But apparently, windows have announced its discontinuity in Windows 7 in terms of updates and security. This made some Windows 7 users migrate to Windows 8 and 10, most especially windows 10.
Although Windows 11 have been released after several years of sticking around with Windows 10. Windows 11 comes with a lot of requirements that need to be met or tweaked for you to be able to install it, again this made some people stay with Windows 10.
Today we won’t bore you with stories of Microsoft or Windows history, but we will be showing you how to install the Windows 10 operating system from scratch. This tutorial is suitable for newbies and professionals.
This tutorial is also suitable for all kinds of computers that support windows OS and also apple computers. That is if you’ve done your homework properly on how to install windows on an apple computer.
Table of Contents
Windows 10 system requirements
To ensure Windows 10 stability and functionality Microsoft has to pinpoint Windows 10 requirements. The requirement is as shown below.
- You need a display resolution of 800×600 and above.
- At least 1GB ram for 32-bit processors or 2GB ram for 64-bit processors. Check your computer bit here.
- Your processor needs to have a speed of 1 gigahertz (GHz) and above.
- Make sure you are running the latest version of either Windows 7 SP1 or Windows 8.1 update. (This article is for a clean installation, this is not necessary)
- You need a hard disk or SSD space of 16GB for a 32-bit operating system or 20GB for a 64-bit operating system.
- Your computer needs to support a direct x 9 graphics card or later, with a WDDM 1.0 driver.
Things to check out before installation
- Make sure your computer complies with the said requirement above.
- Make sure you have your computer or laptop plugged into the power outlet or make sure your laptop battery is not bad and you have a battery of 70% above. This is because Windows 10 installation might take up to or more than 30 minutes depending on how fast your computer is.
What you need to carry out this windows 10 installation
You need 2 things.
- A computer (laptop or desktop).
- Windows 10 bootable CD or Windows 10 USB flash drive
Step by step guild on how to install windows 10
Step 1
Back up all your files on your computer using an external drive. Next, you need to get a bootable CD or a USB flash drive containing the Windows 10 ISO file, you can download windows 10 here. A bootable CD is a CD that has Windows files inside.
A Windows bootable CD is capable of installing and formatting the Windows computer. You can get Windows 10 bootable CD in stores like eBay, Jumia, Aliexpress, and also all authorized outlets.
If your laptop doesn’t have a CD ROM you can buy an external CD ROM or make use of a USB flash drive. Also, learn how to install Windows from a USB flash drive before proceeding.
Step 2
Insert your CD or USB flash drive and shut down your computer so we can begin the installation process. Remember this is a fresh installation process and not an upgrade installation process.
I will write about upgrading your computer in my next article but for this, this is a fresh installation from scratch. You need to back up files, your files will be lost if you don’t back up your files.
Step 3
Find a way to boot to BIOS settings. Most computers come with a boot setting. once you put your CD it gives you the option to boot from CD, while some don’t come with it in the default setting, so how do we solve this?
You need to find out how to boot to BIOS setup. In some Dell computers, you can use the F11 keys. On other computers, you can use the Esc, F10, F11, and F12 keys. Some Toshiba Dynabook will require you to make use of the left and right arrow buttons to make choices of where to boot from.

After you must have successfully opened the BIOS menu, go to bios setups, change to your preferred boot options, or change boot mode settings. You can as well change the boot process from CD to USB and so on.
Step 4
After you must have selected your boot option, wait for the Windows to load.
Note: If you are using a bootable CD remember to click any button (as shown On the screen) to boot from the disk. Your PC screen might go blank or look as if it wants to crash, no need to fear this is part of the installation process.
Step 5
You should be able to see the Windows logo by now, your computer will boot to a new window, which will ask you to “install now”. Click on the “install now” button.

Step 6
Another new window will pop up. Here you need to fill in your language option, time, currency format, your keyboard, and input method. Be sure you are choosing the right option.
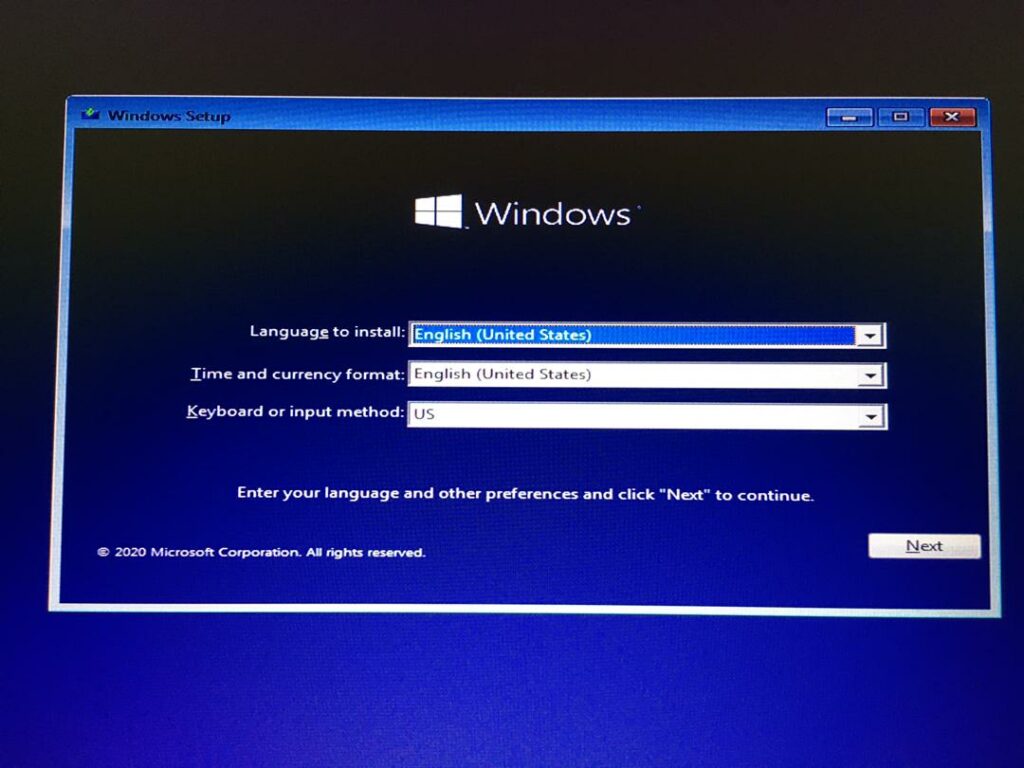
Choosing the wrong settings might cause trouble at the end or during the installation process. For example, using a language you don’t understand.
Step 7
Activating your Windows. If you got your Windows bootable CD from an authorized dealer you should be able to see your activation code In your CD pack. Check around to find it. If you are using USB mode for installation you can buy a windows 10 key after installation.

If you already have your key then correctly fill in the space for key activation.
If you don’t have the key just click on “I don’t have a product key” and continue.
Step 8
Select the operating system you want to install. There are different variants of the Windows 10 operating system, for example, Windows 10 Pro, Windows 10 Enterprise, Windows 10 Pro N, Windows 10 education ETC.

You need to select the one suitable for your business. If you select (Windows 10 pro N) you won’t get the full package for Windows 10. Some software like Groove, Movies and Edge browser won’t be available, because it is a light version of Windows 10.
Make sure you make full use of your computer bit. If your computer support 64-bit make sure you use 64-bit, and if your computer support 32-bit make sure you use 32-bit. Please note that X64 architecture is known as 64-bit while X86 architecture is known as 32-bit.
Don’t know your bit? See how to know them.
Step 9
Accept all Windows terms and conditions. Tick on the box then proceed. Hold on! It is advisable to go through the terms and conditions before clicking on the accept button, sorry.

Step 10
In step 10 there are two options available.
- Upgrade: Install Windows and keep files, settings, and applications.
- Custom: Windows only (advance).

As I explained earlier this article is not meant for upgrade installation but a clean installation of the Windows 10 operating system.
If you are upgrading, this is where you depart from this lecture but if you want to go the advanced way then we continue.
Click on “custom: windows only (advance)” then continue.
Step 11
Partition of the disk. This is where you need to focus because any mistake or wrong decision here might reduce the usable size of your disk, or mess up disk partitioning.
Luckily for you, I wrote a detailed article on disk partitioning, I advise you to go through it before continuing.

Anyway, there’s always a spoiler, let me give you a spoiler. Look at the partitions properly you would find out the partitions are of different sizes. What you do here is to pick the highest size and then click on next.
But if you want to make good use of your disk I would advise you to go through the disk partition article I wrote.
Step 12
A new window will pop up, this is where Windows start copying files from your CD or USB flash drive to your hard disk or SSD. It will take a while before completion.

I normally go in search of sausage and a cold Coke to calm my nerves down. You should do the same don’t you think so?
Step 13
After spending some minutes copying files from the source to your disk, boom your computer should shut down by now. You are not to worry, it is still part of the installation process.
You should be able to see the windows loading after the reboot.

Step 14
Connect to the internet for more setup. If you bought your Windows CD from a store, roadside, or from the windows website the possibility of it being outdated is 99%.
There are a lot of updates for windows 10, altering the windows files on the windows website or CD would be a waste of time because the update is released routinely.

So if you have enough data ( mind you I said enough data) you can connect to your WiFi or modem then let Windows update your Windows 10 to the current version.
Update files may be huge depending on how outdated your package is, this will take more time to complete. You can get another coke if you feel like it.
If you don’t have data or you just want a quick install, just click on “I don’t have internet”.
Step 15
A new Windows will pop up, this time around it should be from Cortana our good friend. Cortana is an app that is embedded in the Windows 10 operating system and its function is to increase accessibility.

If you have data then click on continue, but if you don’t have data or you are not sure what to do just click on “not now” you can always set up Cortana any time you feel like after installation. Now Set up your privacy settings, for me, I leave it that way, then click on accept.

Step 16
Who is going to make use of the PC? Here you fill in the name of the person or company that is going to make use of the computer you are installing windows 10 to. For me, I will make use of my 9ja Tide as my name. All I need to do is to type it and click on the Next button.

Step 17
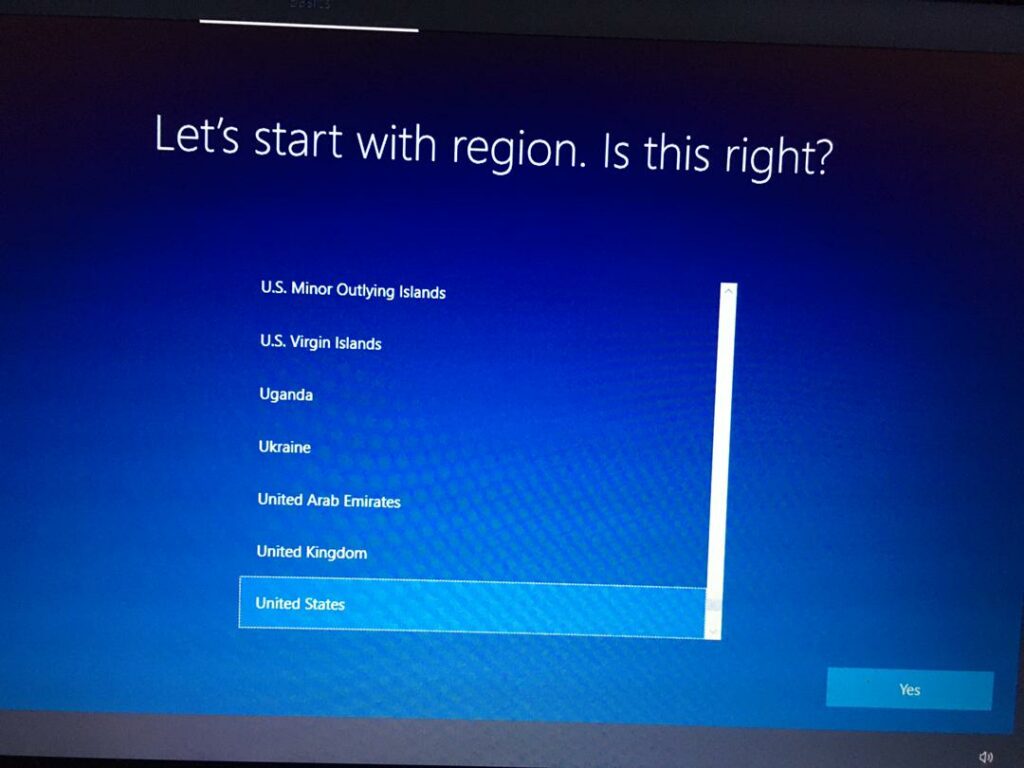
Setting up keyboard layout, no need for that if your keyboard is the normal QWERTY keyboard layout, but if it is not then you can add your preferred layout. Also, set up the region, then grab a coffee and wait for Windows to finish up setup.

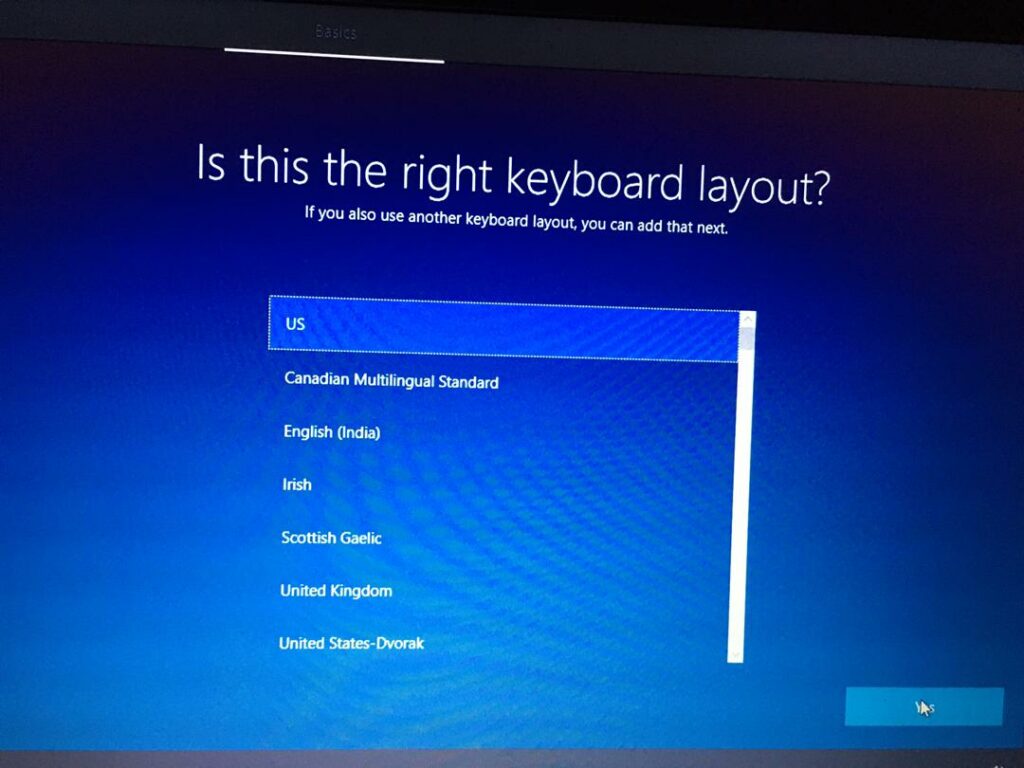
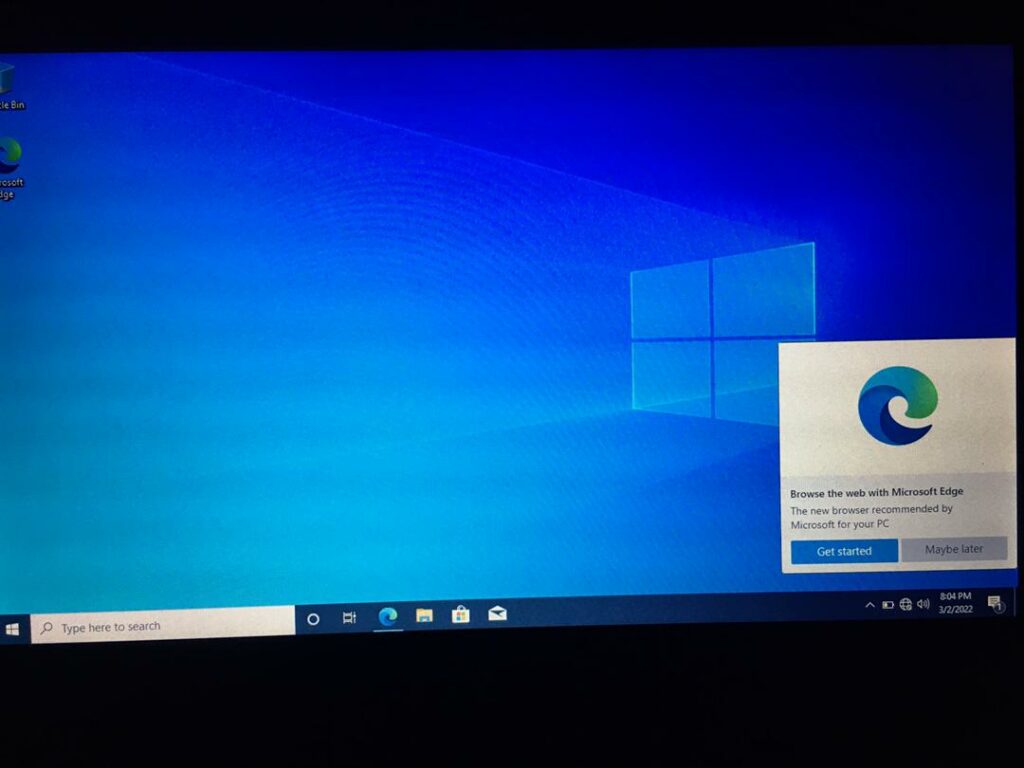
After that, you should be able to see your Windows 10 desktop. Was it hard? I don’t think so, I did enjoy setting up my windows 10.
Where to buy cheap windows 10 activation key
You can buy cheap activation keys for windows 10 on Aliexpress.
Aliexpress
Conclusion
Window 10 comes with a beautiful display, it supports different customization options and it is also easy to use.
Setting up Windows 10 isn’t difficult, but if it is your first time doing it you might find it hard to run the installation processes. With this step-by-step guild on how to install windows 10, it is so much easier.
NOTE: This setup might look a little bit different from yours, this is likely to be because of the updated or outdated version of Windows 10 you are installing.
If you are stuck somewhere during the installation process you can drop a comment in the section, we would be eager to help you out.


